Verizon FIOS Setup
This is how to setup Verizon FIOS for one of my customers. The process below assumes you have a certain level of understanding of many concepts : wireless, networking, firewall rules, etc - this document is not meant to teach that, merely to record what I have done.
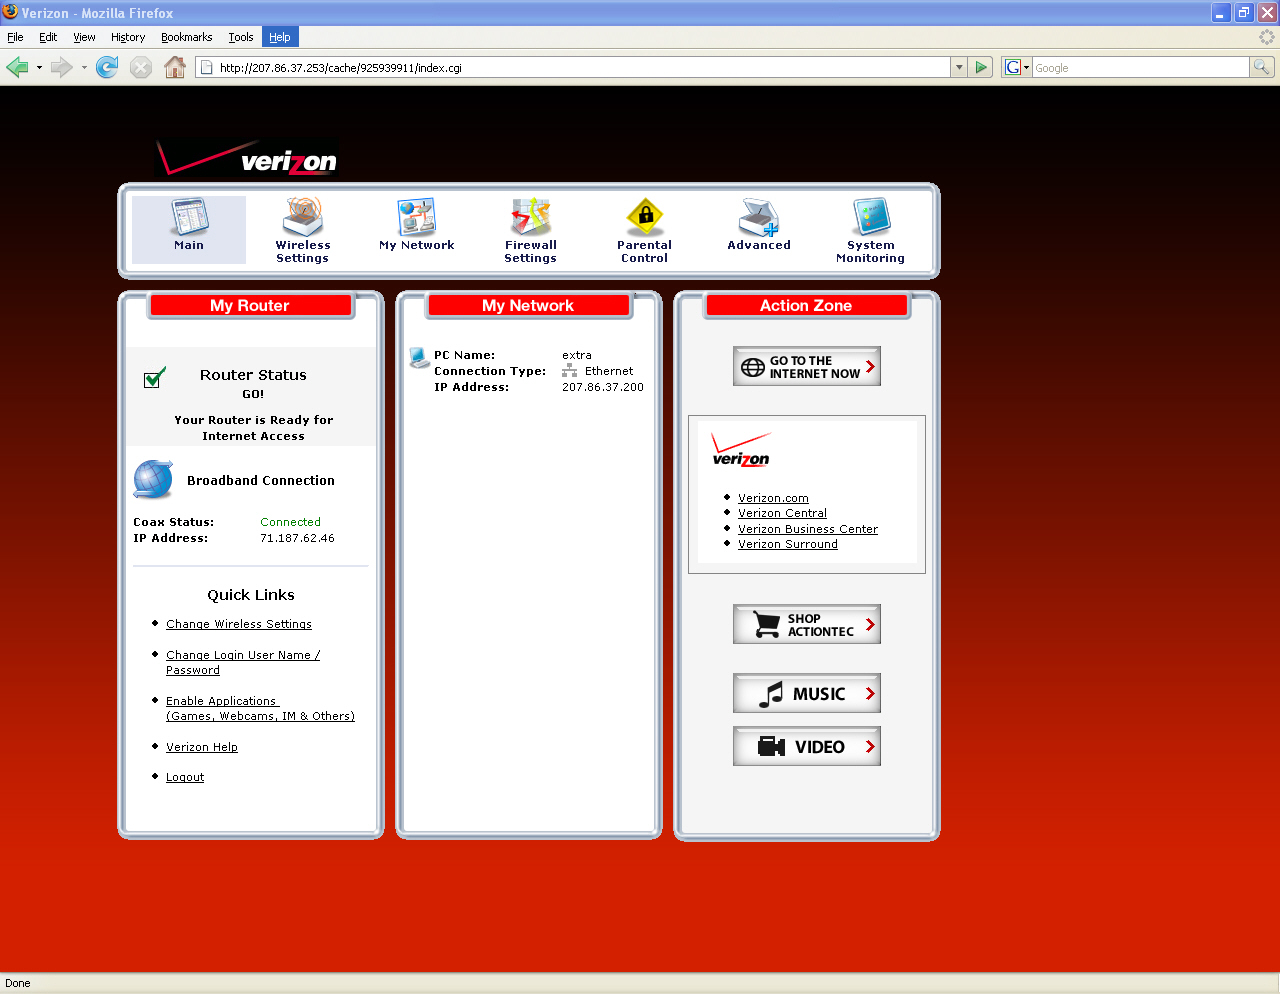
The first thing you see after logging on with the default user name and default password, is a password change screen. I have not shown that here, but once you get past it, you can follow along here. With that in mind, this is the summary screen, which shows your WAN connection status on the left, followed by your IP address, and a few other actionable links. The center vertical bar shows the devices connected to your lan that are communicating with or through your FIOS modem.

After that comes up, use the navigation bar at the top to click on the "My Network" icon
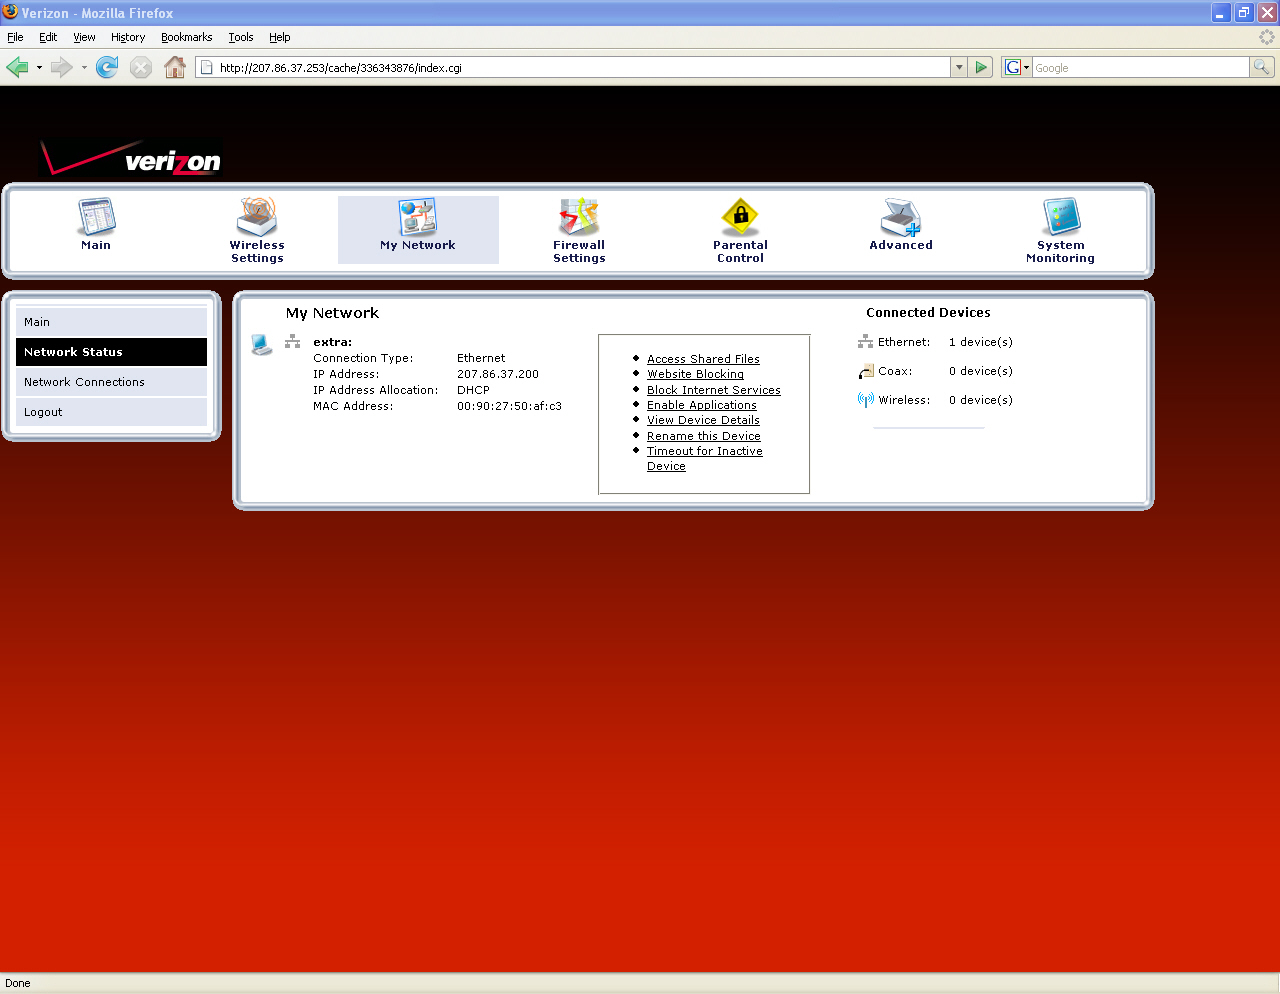
That link will take you to a screen showing all your configured networks at this point. On the left side menu that results, click the "Network Connections" link and that will produce the following screen :
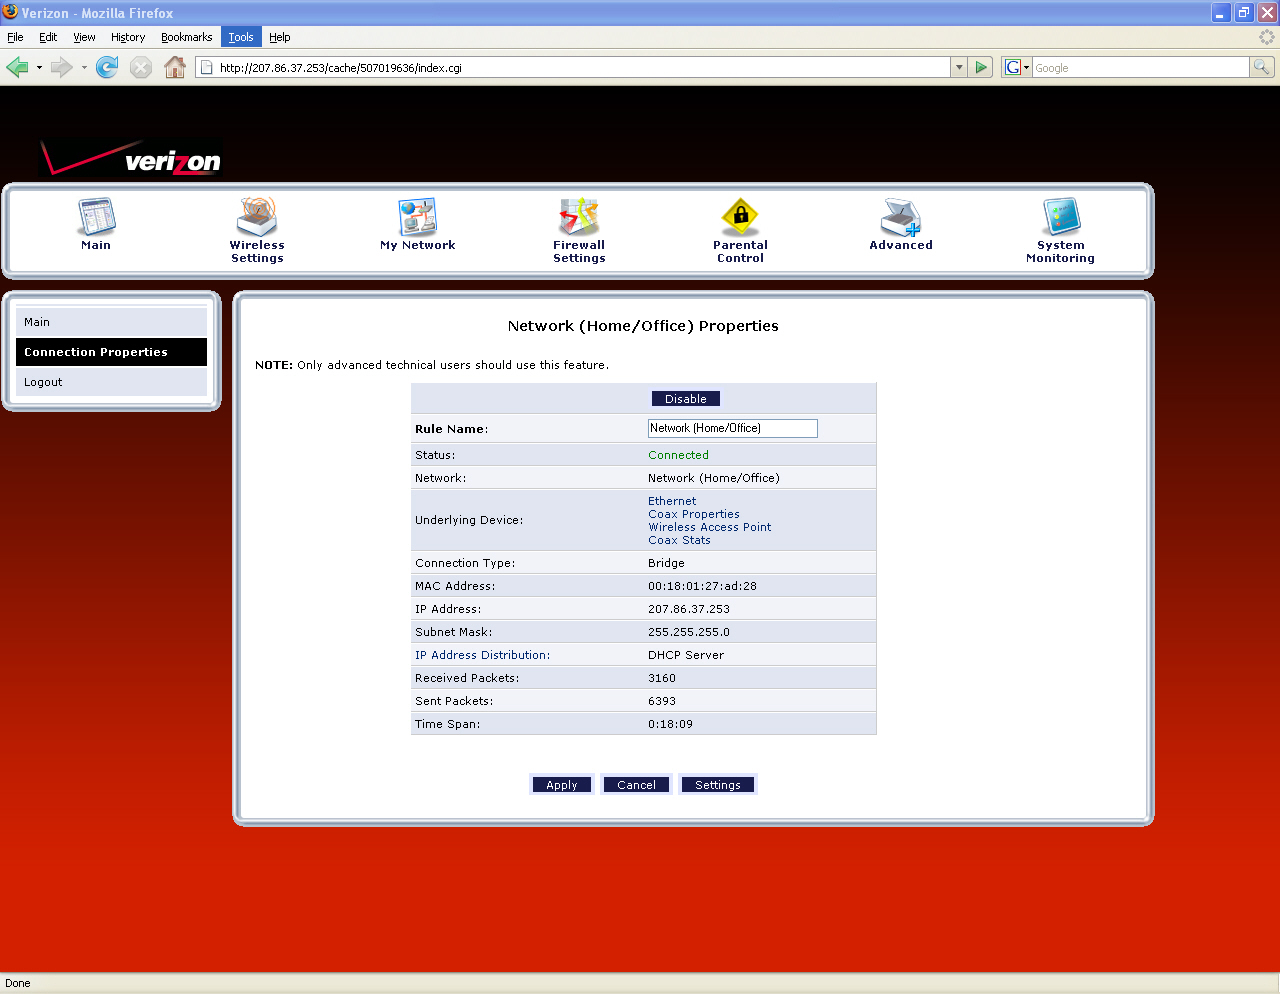
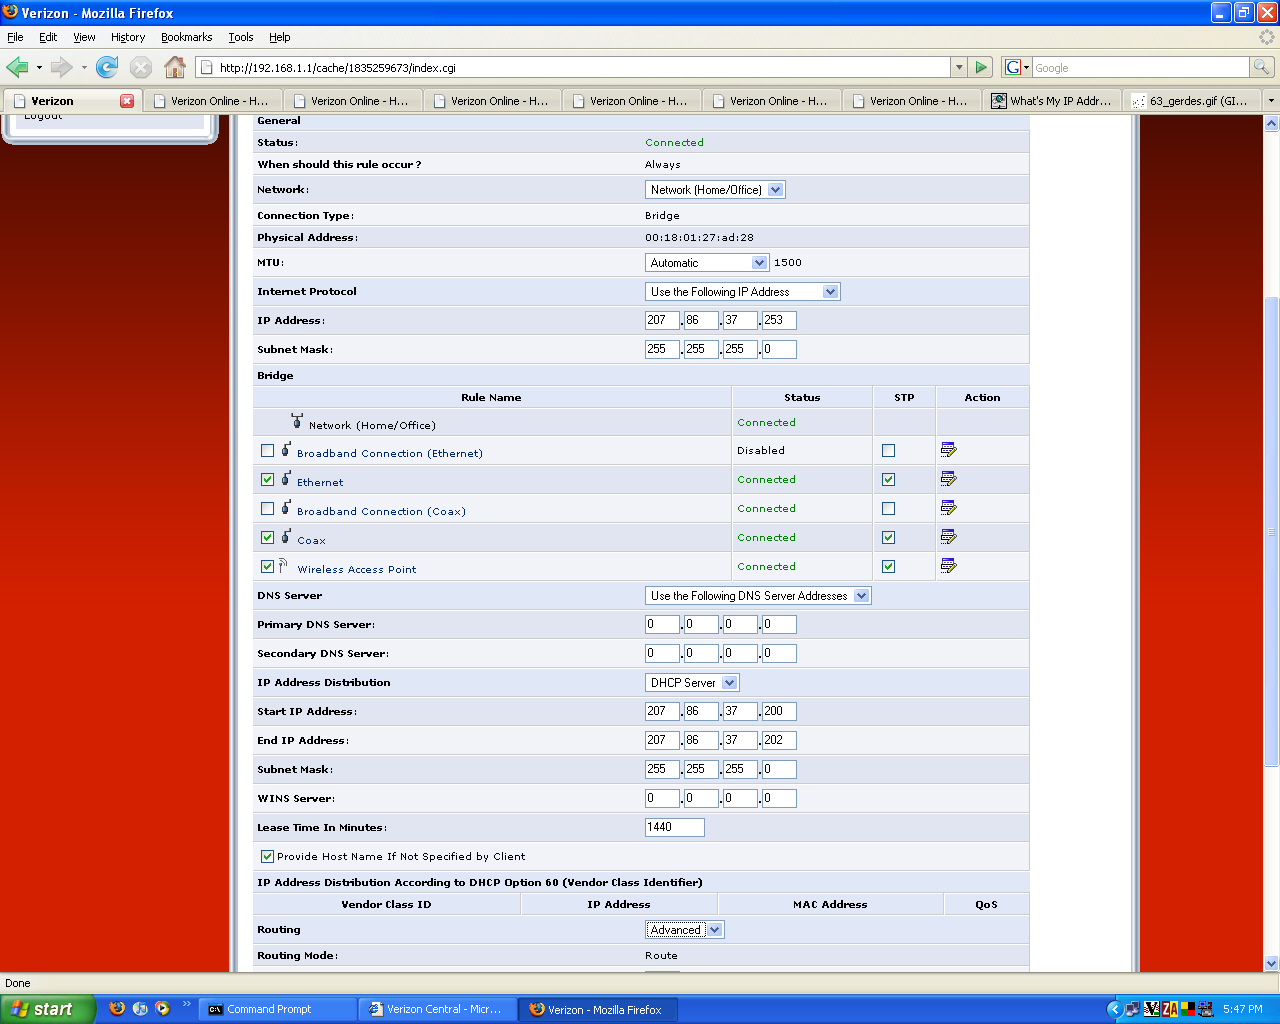
From there, click on the blue "Settings" button on the bottom of the page. That results an a long screen that takes one very long screen to capture. This is where you set the IP address of the FIOS modem to what your internal network should be. In most cases - and I do mean most, this defaults to 192.168.1.1 which will be fine. In my case, I need to reassign to a network range that is not of that 192.168 family - so this is where I do it .
This is also the screen where you configure the DHCP server section. I only like to share off 2 or 3 addresses at max, and usually use MAC filtering to further lock them down, but didnt do that yet.
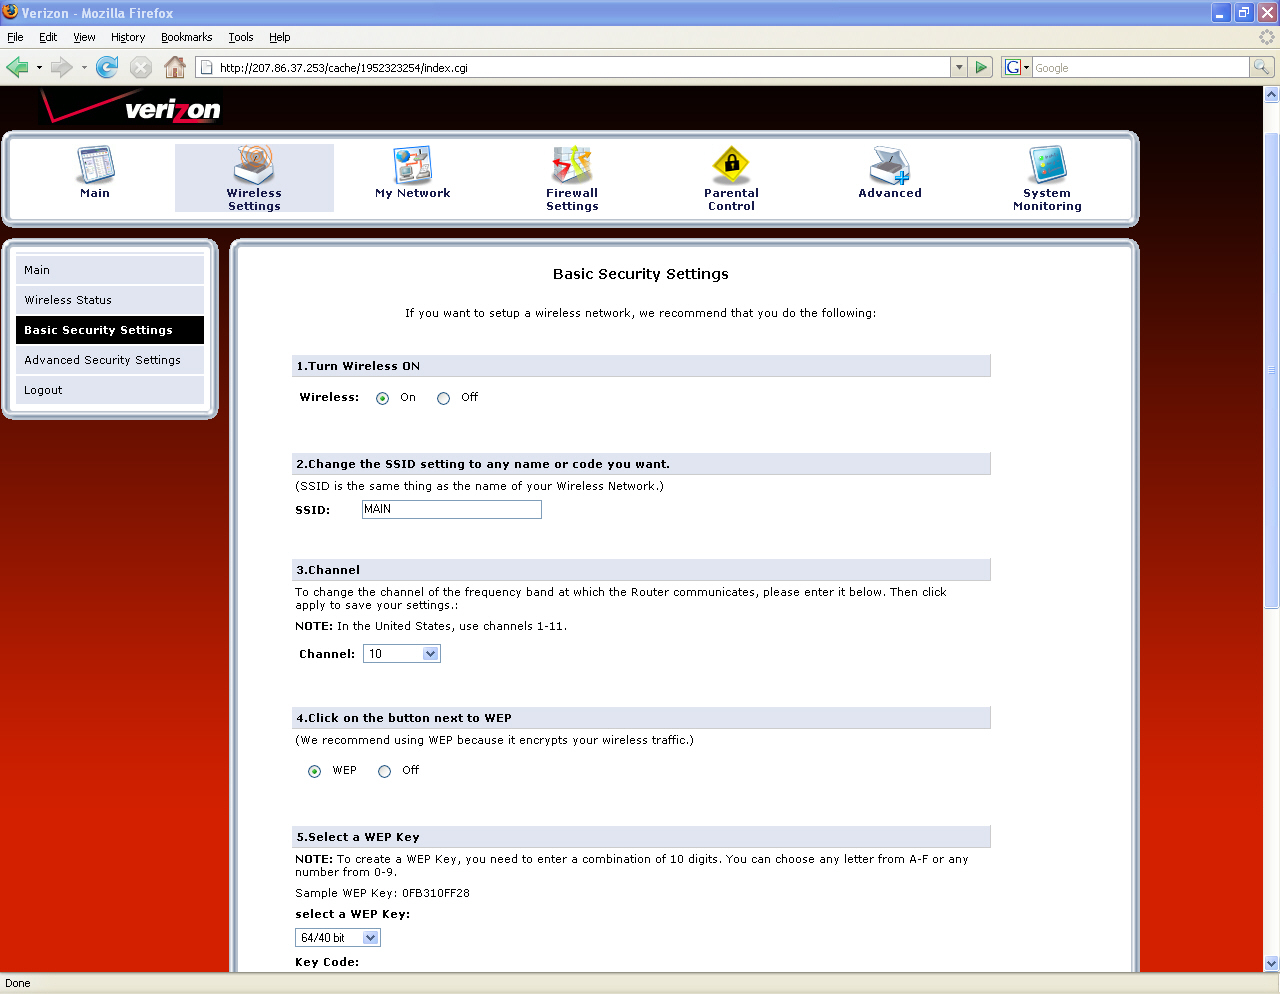

So in that wireless screen combination, that is where you set your WEP (or other encryption methods) on or off, set your WEP keys, set your SSID, and your channel if you need to.
Next we go to the port forwarding section. We get there by clicking in the top navigation / menu frame, on the "Firewall Settings" icon. From there, in the left hand menu that results, click the "Port Forwarding" link.
That results in a screen that looks similar to the following. This is where I am trying to simulate what I used to do with the Application and Gaming section the old Linksys WRT54g.
Note that I didnt think to capture this screen the first time I went into it, so I had no choice but to show it with 2 services already configured. Anyway - this is what it looks like :
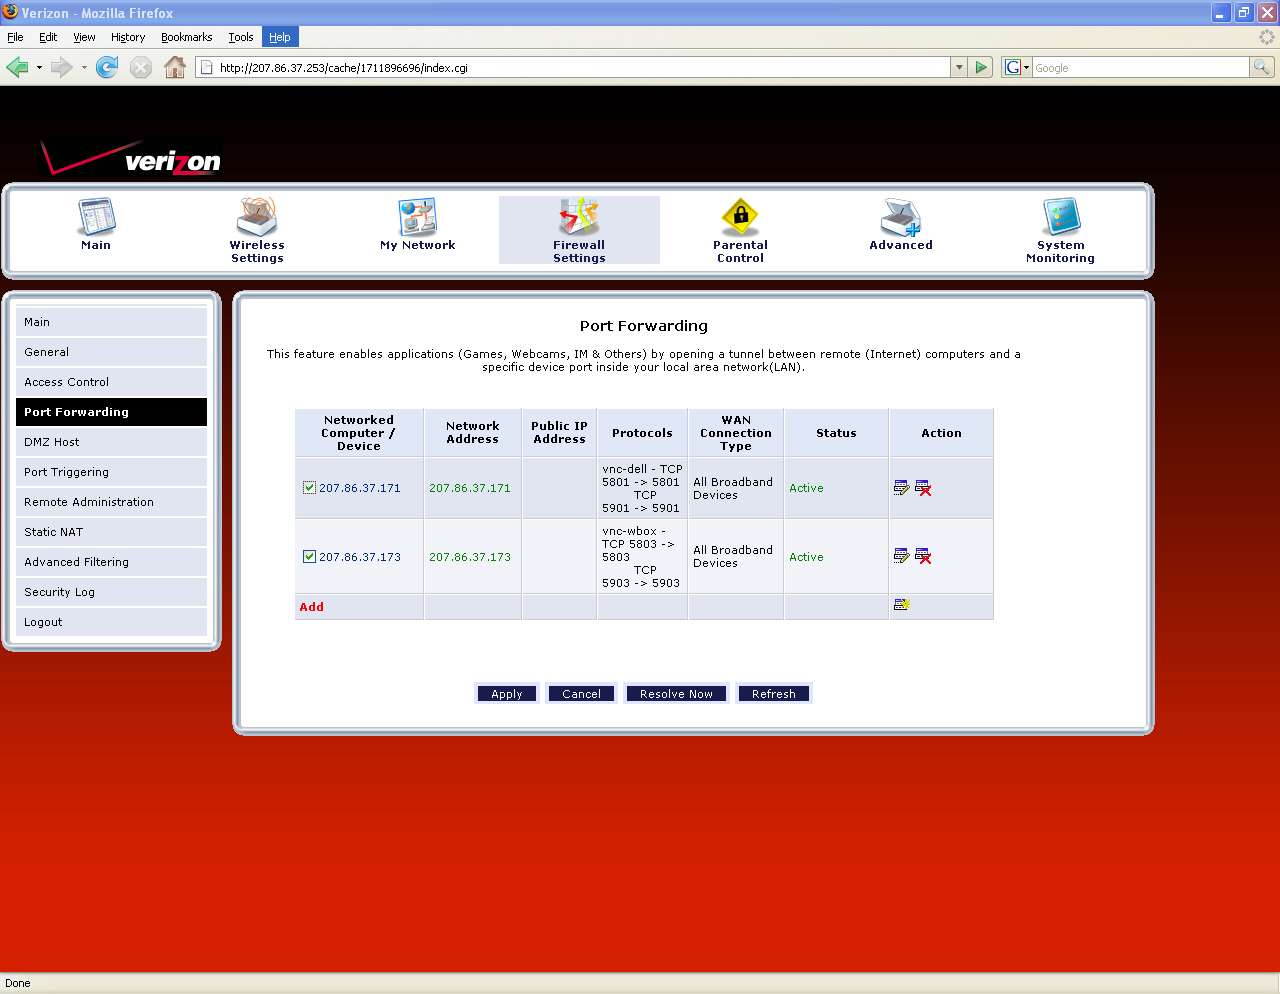
So what you do is to click the Add button. Then it wants you to choose a port forwarding rule. So I then set the destination for this rule and then click the "Add" for the protocol since VNC isnt already defined.
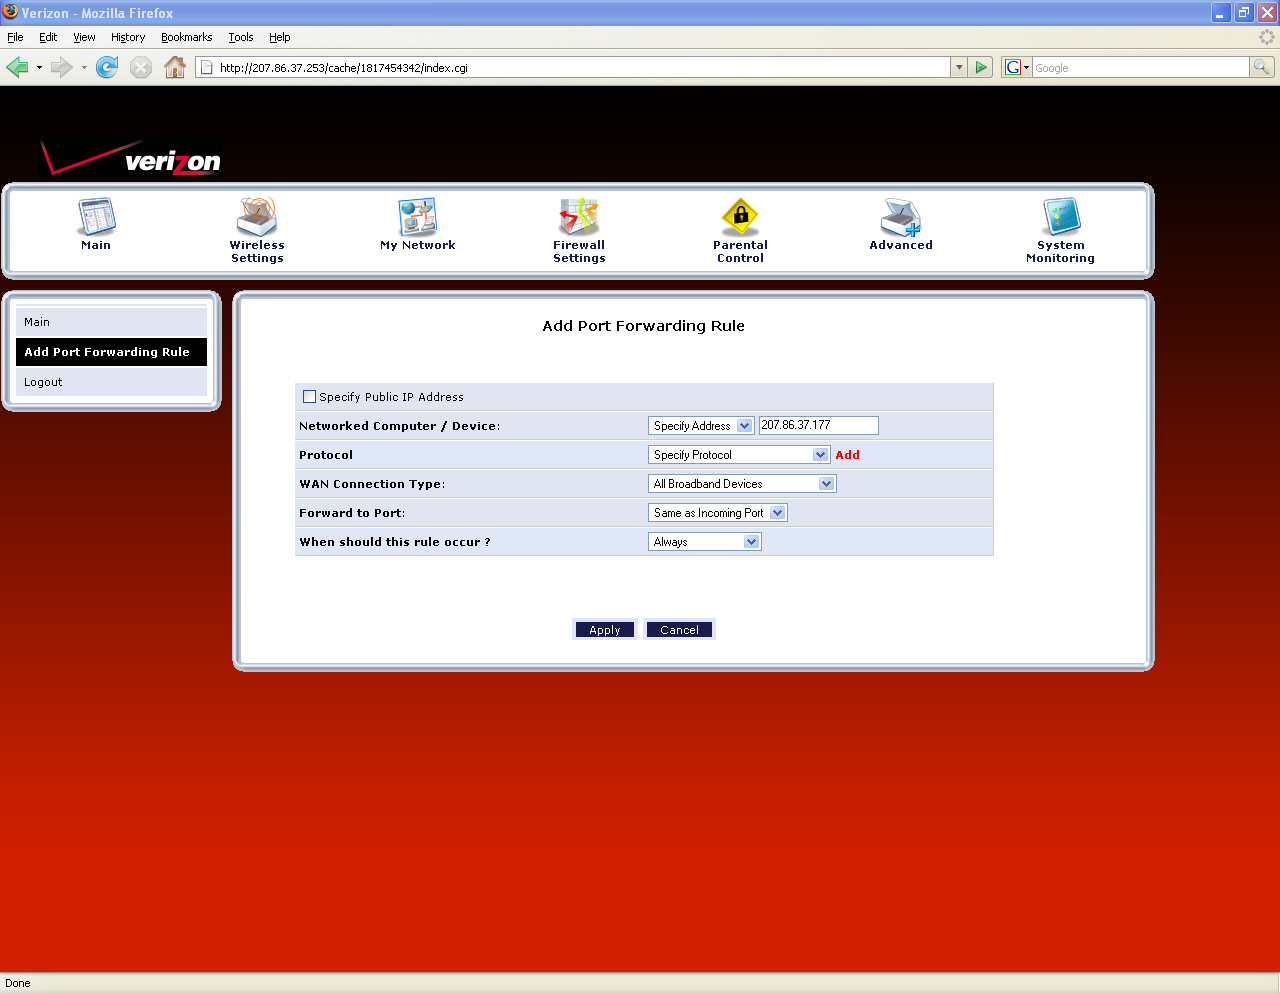
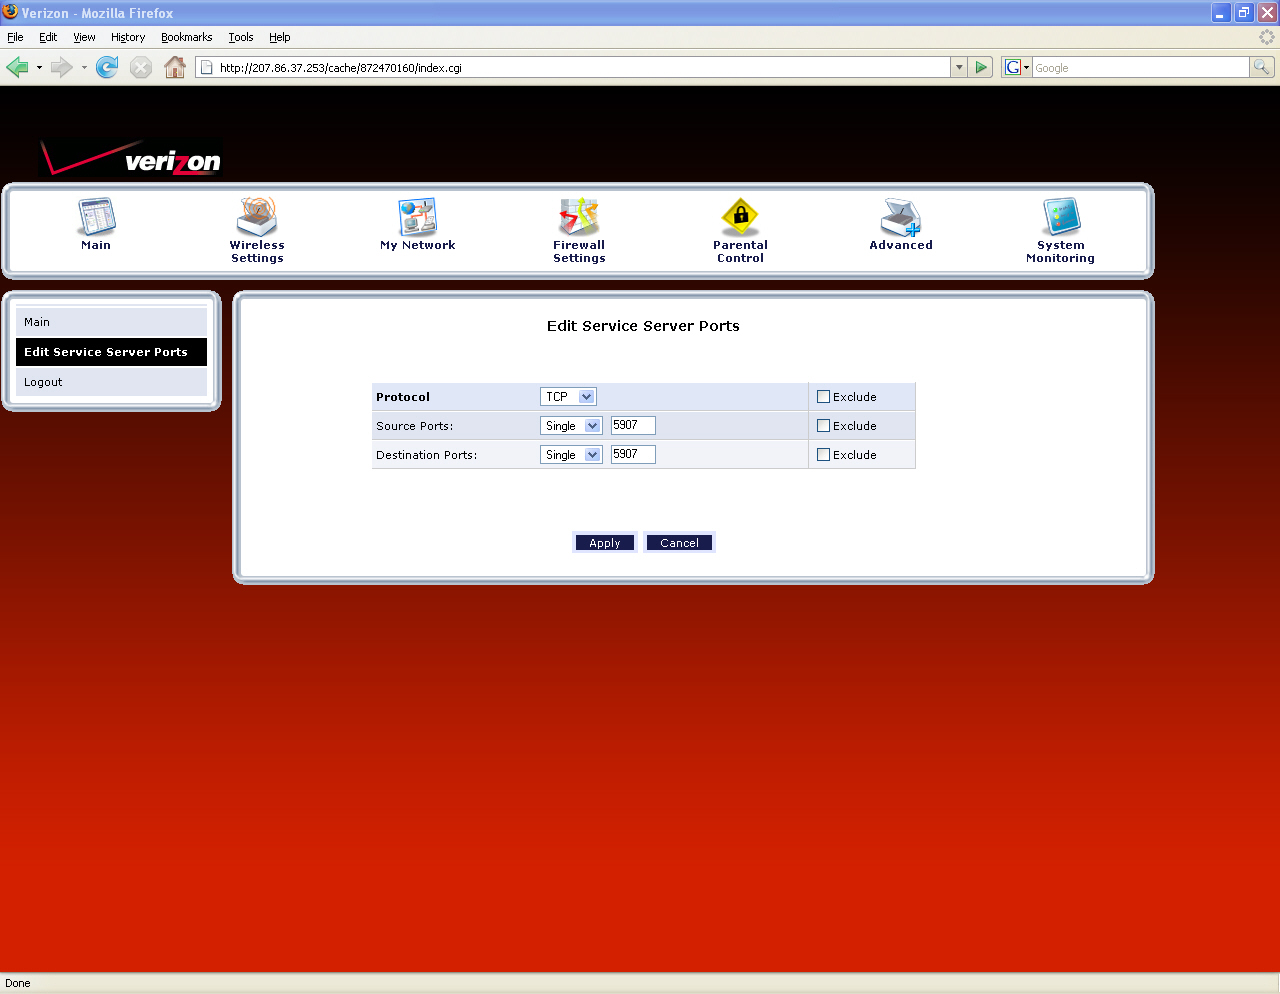
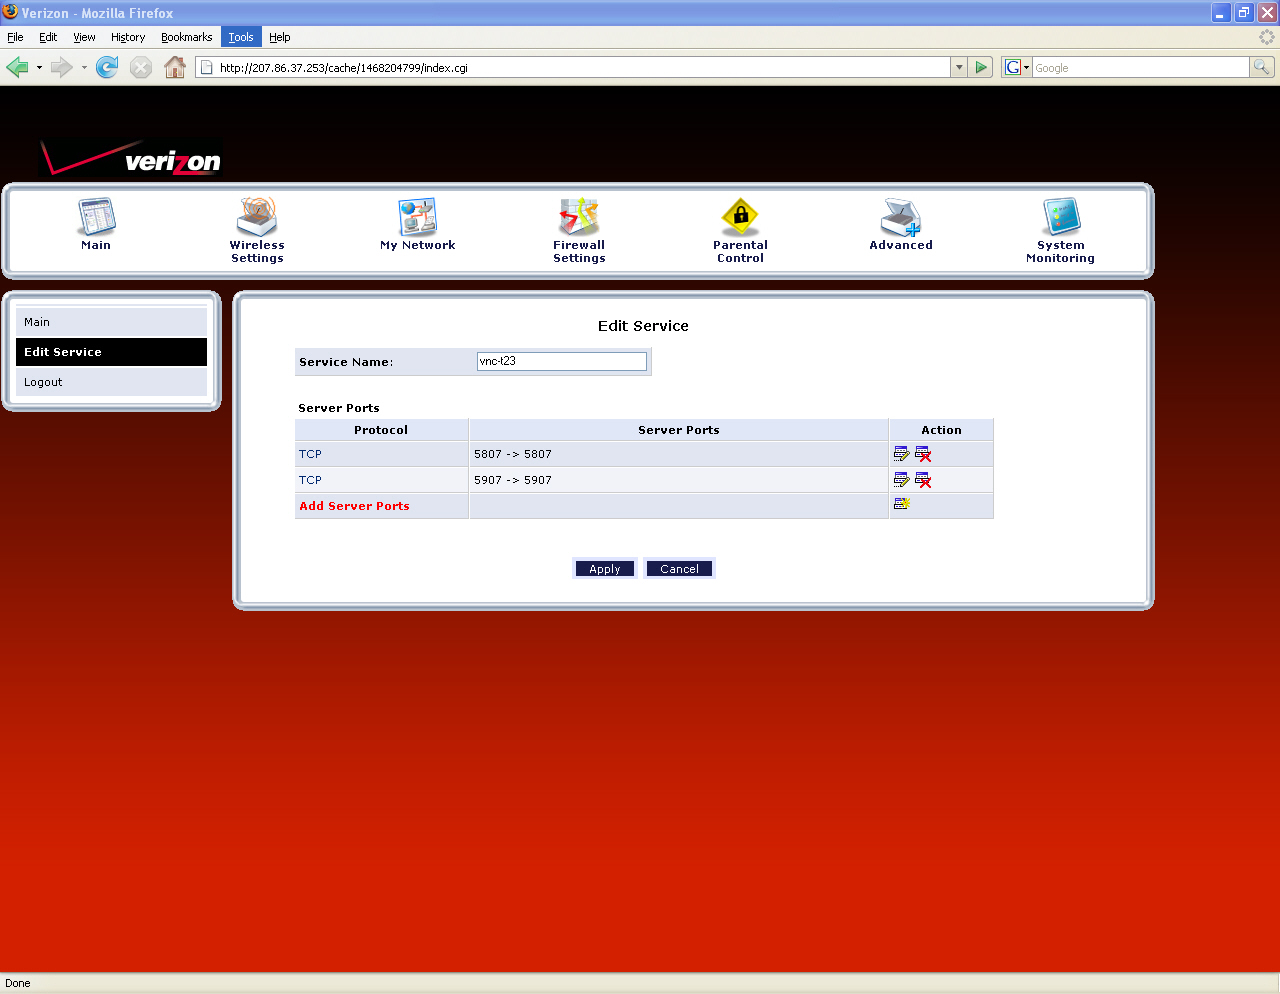
Since a protocol is just a service - at least as far as this context goes, choose a name for this new Service and enter it in the "Service Name". I used something like "vnc-t23" when I did it. Then click the red "Add Service Ports" link next.



This page last updated 04/17/2007.